Domino MIDI Editor Basics
This article will talk about fundamental operations of Domino MIDI Editor in-depth from placing your first note to exporting a MIDI file. This will be the first steps to learn when trying to create a black MIDI as a beginner.
Managing Tracks
The track list can be toggled by pressing the Tab button or the blue spreadsheet icon at the top right. Alternatively, a track list side panel can be toggled on the menu -> View -> Track Selection Panel, which will always show on the left side. The position of this panel can be customized on the Preferences window -> General (pg. 1) -> Track Selection Panel position.
If you are using a sound source definition, creating a new project will give you a template with 16 tracks already set up.
Adding Multiple Tracks
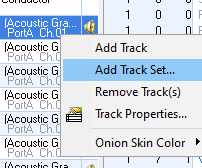
If you want to add another set of 16 tracks and channel assignments, simply right-click on any of the tracks then click on Add track set...
The following prompt will appear asking you which channeled tracks should be created:
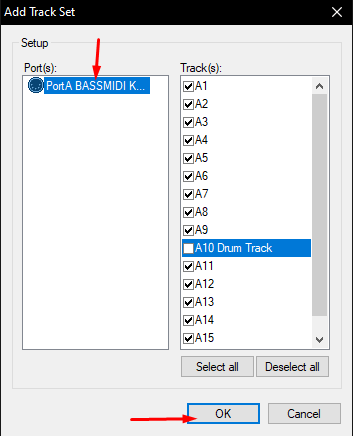
The tracks should be added right away afterwards.
Adding a Single Track
Alternatively, if you only want to add a single track, choose Add track instead on any track context menu.
With this, check if the track is pointed at the same port where the synth is, by right-clicking on the new track -> Track Properties.... On this case, the new track is pointed at port B, but we only have the synth at port A:
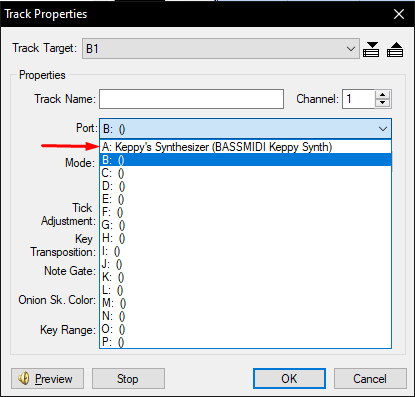
TIP
If doing this step every time to add a track is bothersome, you may set all the ports to point to a single synth in the Preferences.
You may set up the name of the track to keep track of it. The channel number should also be setup correctly as you do not want CC event conflicts between tracks.
The mode of the track only dictates what the piano roll should look like. It does not completely tell the synth that it is a drum channel.
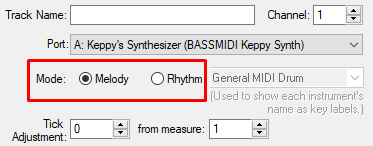
If Rhythm is toggled, that track will show the piano roll's keys as percussion instrument names.
To change the channel into a drum or percussive channel, change the channel number to 10.
Piano Roll
Placing Notes
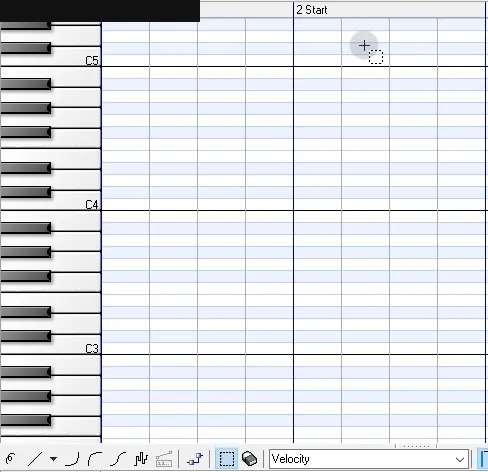
To place a note, just click on the desired position of the note on the piano roll. You could also place one through the menu -> Insert -> Note if you are keyboard savvy.
Resize the notes by click-holding and dragging the right edge, or by adjusting gate values in the Event List.
To undo an action done, press Ctrl + Z. While Ctrl + Y can redo the undoed action.
Selection Box
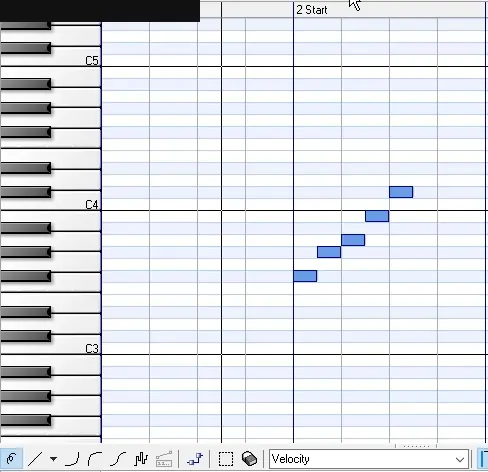
To move a note, simply click hold and drag it. To move many notes, use the selection tool (button with a dotted square outline icon) and make a selection on the piano roll by click-holding and dragging over the desired notes to move.
If you want to move that selection to another track, you can press Ctrl + C to copy the selection first, then toggle the destination track and press Ctrl + V to paste.
You can make multiple selection boxes by holding Ctrl before you make another selection (and you can let go of Ctrl after clicking to keep the grid snapping effect).
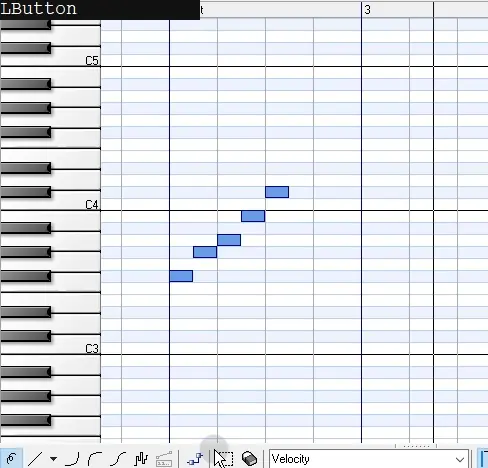
To duplicate a selection, simply hold Ctrl then click hold and drag the selection. This will make a duplicate of both the selection box and notes, deselecting the other.
To remove notes, use the eraser tool. It acts like a selection tool except it also deletes the notes. Alternatively, you can make a normal selection and press the Delete key.
Time Signatures and Quantization
The rhythmic signature can be changed by first clicking on where to place the time signature, then inserting the event through the menu -> Insert -> Rhythmic Signature. This event can be inspected on the Event List by toggling the Conducter track first.
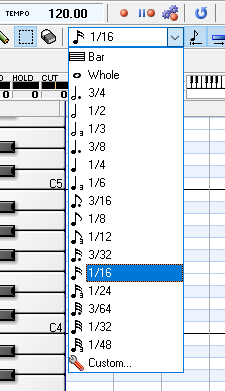
The above shows options on the division of the grid snap on the piano roll when placing notes. Change this value depending on how precisely aligned the notes and selection you want to make to the divisions of the rhythm.
While editing notes, you can hold Ctrl to deactivate quantization temporarily for precise note placement.
MIDI Hardware Recording
If you have a MIDI hardware, you can make use of it to arrange notes to the piano roll as you play it. To configure this, press Ctrl + R or click the record icon at the top center beside the time panel of Domino.
More about MIDI recording is located in the miscellaneous section.
Graph Panel
The graph panel is where corresponding effect values applied to notes are visualized. This mostly involves the note velocity and control changes (CC) which create a particular sound effect.

The stroke buttons at top of the graph panel cannot be used to draw the same line forms right onto the piano roll and will take real effect only on the graph panel itself. When used on the piano roll, it simply acts as a note placer.
The following video showcases various graph panel use cases:
Graph Panel Demonstration
Video Summary
- You can enable draggable anchors to adjust individual graph points up or down
- You can isolate graph application on a specific selection. (applies only to Velocity)
- The graph resolution dictates how detailed the graph formation should be. A lower resolution results in a more blocky graph. This value can be adjusted through the arrow dropdown beside the line graph tool ->
Resolution.... - You can apply graph functions/expressions to a selection.
- Graphs can be restricted to the starting point of the parallel notes as the graph is applied. This can be enabled through the arrow dropdown beside the line graph tool ->
Anchor to notes only.
Playback
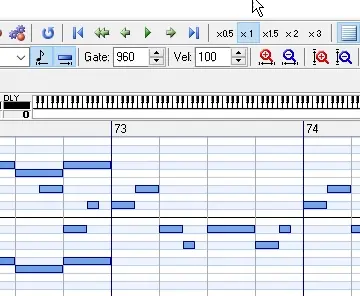
To start the playback, you could press Space or click the green play button at the top of the window. You could press Space again to stop the playback. You can also loop a selection of measures by enabling it on the menu -> Playback -> Loop -> Enable or by clicking the blue cycle icon:
MIDI File Operations
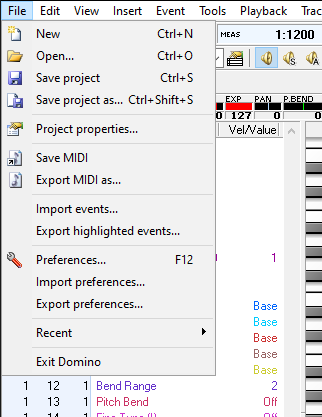
The file operations are located in the menu -> File.
Saving projects
You can press Ctrl + S to quickly save your project (.dms file). If it's the first time you are saving an unsaved progress, it will prompt you on where to save the file.
Saving projects to .dms may not be suitable for extremely high note counts as some experience loss of progress from saving to .dms. Although the same can be said when it comes to exporting to MIDI right away.
Exporting
Exporting to MIDI can be done by navigating the menu -> File -> Export MIDI as....
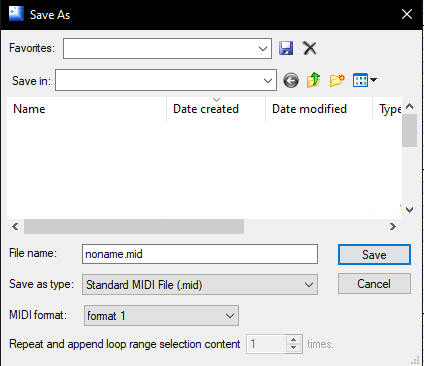
The difference between the two format numbers of the MIDI (or MIDI Types) will not affect much playback performance. Format 0 is only suitable for MIDIs that only have up to 1 track for each channel. Format 1 is suitable for all cases unless compatibility issues arise.
TIP
When exporting large amount of notes, you can disable note overlap warnings to reduce rendering overhead. (Preferences -> SMF -> Note overlap warnings)
Importing
To import MIDIs to Domino, you can drag and drop the MIDI file into the window from File Explorer. You could also press Ctrl + O or navigating the menu -> File -> Open....
DANGER
The above steps will replace your current running project or session. Make sure to save it first if it's important.
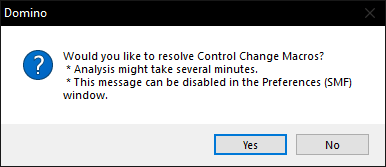
The above prompt will appear asking whether to resolve/restore CC Macros. Clicking No would not have much serious effect on the result and would finish the import process faster. However, if the source MIDI has custom CCs that are not common (such as KS' Fine Tune parameter), this analysis will be helpful in resolving those CCs for proper event placement/plotting within Domino.
Adding to existing project
To import an entire MIDI to your existing project, you have to open the source MIDI on another Domino window first and export it as Domino Parts file (.dmp).
If only a few parts of the source MIDI (e.g. from one track) needs to be imported, you could alternatively keep your existing project opened, while another Domino window is running where the source MIDI is also opened.
You can run another Domino window by running Domino again from the File Explorer.
TIP
This behaviour can be disabled in Preferences -> General (pg. 1) -> Prevent multiple instances of this program.
Then, open the source MIDI, and make a selection of notes or events to copy. Press Ctrl + C then jump to your existing project, and press Ctrl + V to paste.
You can keep repeating this process until all the parts needed are pasted to the current project.