How to black on REAPER
REAPER is a digital audio workstation, which can also be used for editing MIDIs. Although it is not as frequently used by blackers, it is still a viable tool for blacking MIDIs.
WARNING
This article instructs more accurately for the Microsoft Windows operating system.
Installation
Download
You can download this program through the official website:
- www.reaper.fm (proprietary)
Install
Hehe.
First run
Sound setup
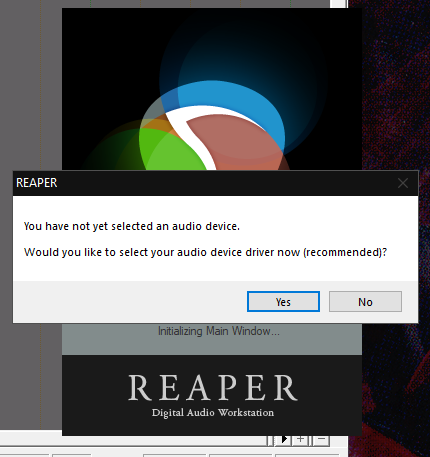
When you open REAPER the first time, this prompt should appear. Click [Yes].
For the 'Audio system', you may choose WASAPI if you are not sure of what to pick.
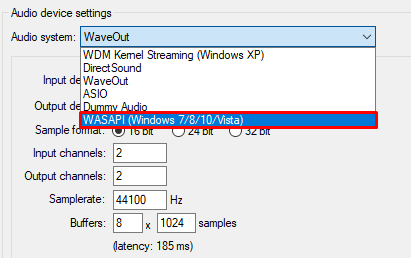
Afterwards, click on [OK].
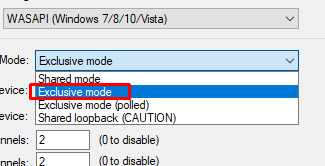
If an error about mismatched sample rate appears, you might want to change the 'Mode' to 'Exclusive mode', so you don't have to go through this troubleshooting.
The next window you will see is the evaluation license prompt. Until you purchase a license, this window will show up every time you start REAPER.
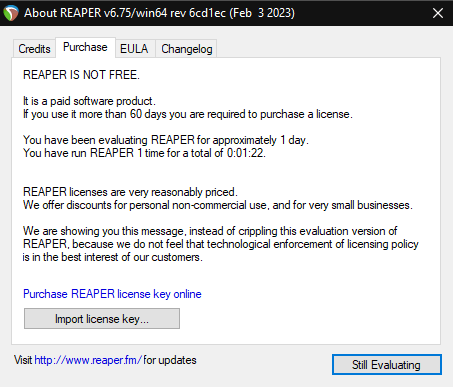
Click on [Still Evaluating]
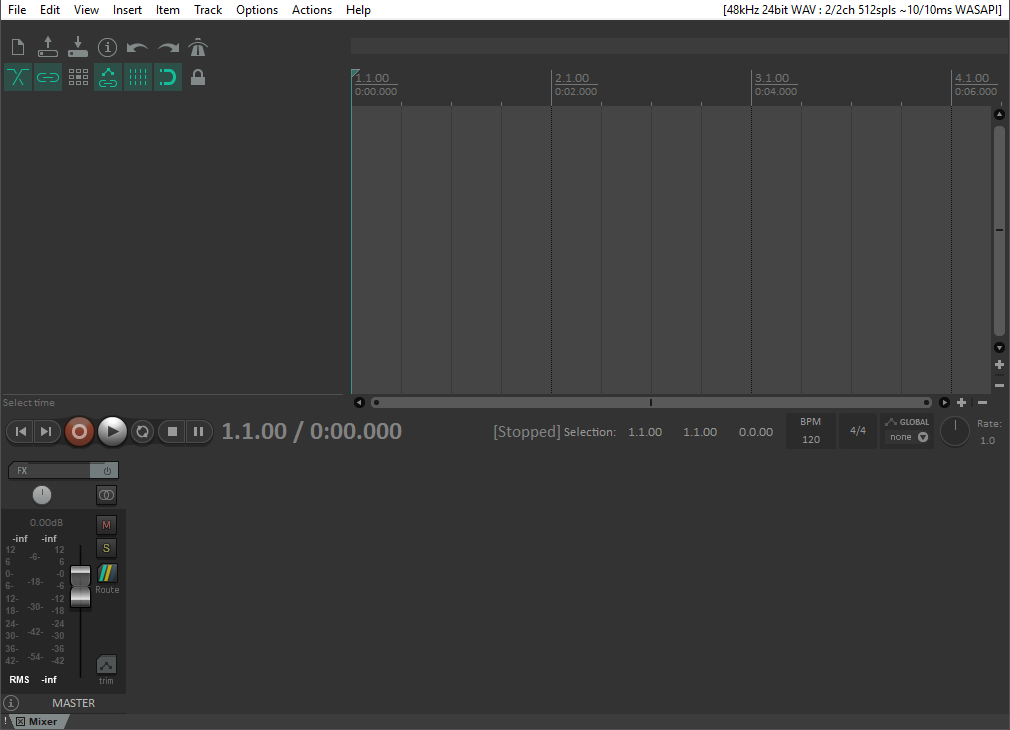
Your REAPER window should look something like this in the beginning.
Synth setup
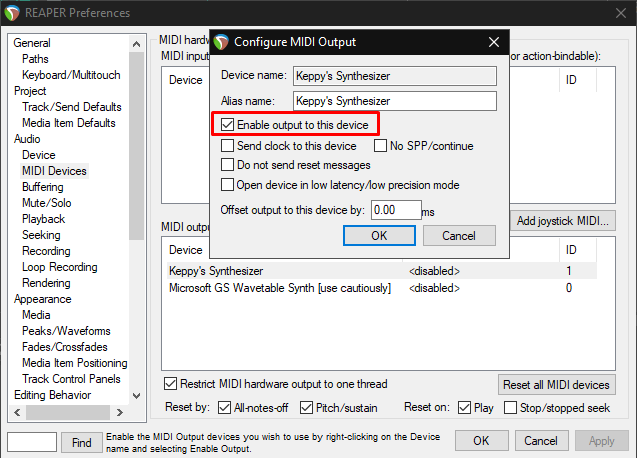
To setup your software synth in REAPER, you can press Ctrl + P
On the left side, find 'MIDI Devices'.
On the MIDI outputs list box, enable the synth where you want your MIDI notes to play. On this case, I am using Keppy's Synthesizer
Setting up MIDI tracks
The following video will show you how to insert tracks and use them to play through the software synthesizer.
Video Demo
Video Summary
- Double click on the mixer window to add new mix tracks (or press
Ctrl+T). - Set all the mix tracks' MIDI Output to your synth (
Send all), by right-clicking on it and finding the option. - Create patterns (sources) on the playlist by holding
CtrlandL-Clickwhile dragging across within each track. - Change the patterns' properties by right-clicking the pattern and clicking
Source properties, or pressingCtrl+F2on the selected pattern. - Toggle the
Set as channelbox on, and set its unique channel number (up to 16). - Do the same configuration for each pattern.
Alternatively, you can use this pre-made template so you don't have to do all of these clickings:
ATTACHMENT
REAPER Template - 16 MIDI out (.rpp)
Click the link above to save it to your computer. If it opens the text contents instead, you can save the page by pressing Ctrl + S retaining the file extension.
You may place this file in the REAPER\ProjectTemplates folder. Then, you can now quickly create projects with this base, by navigating the menu File -> Project Templates -> <template-name>.
Piano roll interaction
The following video demonstrates some familiar functions for MIDI editing.
Video Demo
Video Summary
- You can open the piano roll window by double-clicking on a selected pattern.
- You can dock the piano roll window by right-clicking on the small space at the top left, then clicking
Dock window. - You can create notes by click-holding and dragging across.
- You can select notes by holding right-click and dragging around the notes.
- You can make Bad Apple!! arrangements.
Shift+Alt+L-Clickallows you to draw notes freehand.- You can show the notes through many layers of MIDI tracks using the track list ([context menu] ->
Contents->Track List) - On the track list, the arrow button targets that track as the base for editing. This can be used as your usual track navigator.
- If the track is unlocked, it means it can be edited (together with the base target) at the current state of the piano roll.
- If the track is visible (eye button), then the track will be visible on the piano roll.
- You can play Bad Apple!! arrangements.
MIDI file operations
Exporting project to MIDI
Video Demo
Video Summary
- Open the project
- On the menu, go to
File->Export project MIDI... - Set the desired output destination
Importing to project
Video Demo
Video Summary
- Open a project
- Drag and drop the MIDI file from the file explorer.
- Alternatively, on the menu, go to
Insert->Media file..., then select the desired MIDI file.
User experience
Hotkeys
Customization
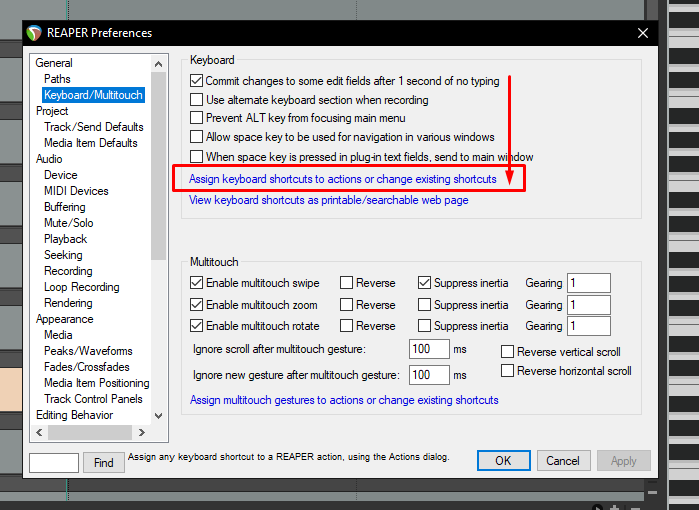
You can set your own key binds to specific actions by navigating Preferences -> General: Keyboard -> Assign keyboard shortcuts ....
For example, we could set a custom key bind to the scroll behaviour:
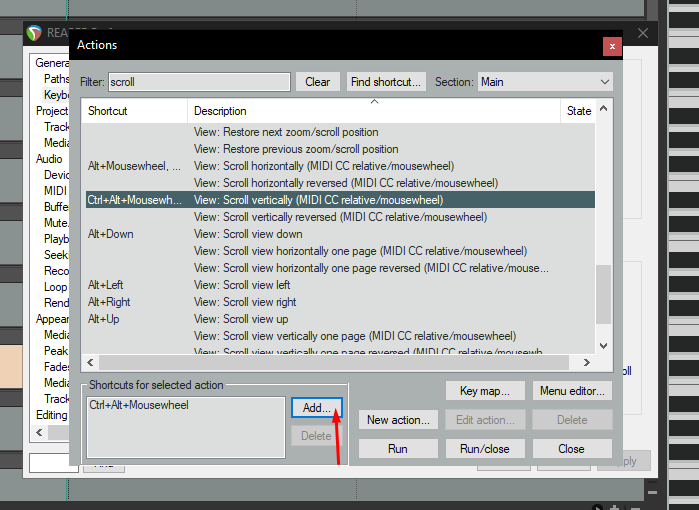
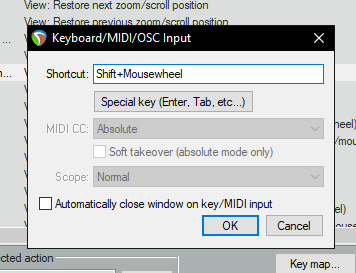
At the same time, we could also change the mouse behaviours. (Refer to the following section.)
Strum notes by dragging
Selected notes can be easily strummed by modifying Mouse Modifiers found under the preferences Editing Behaviour category.
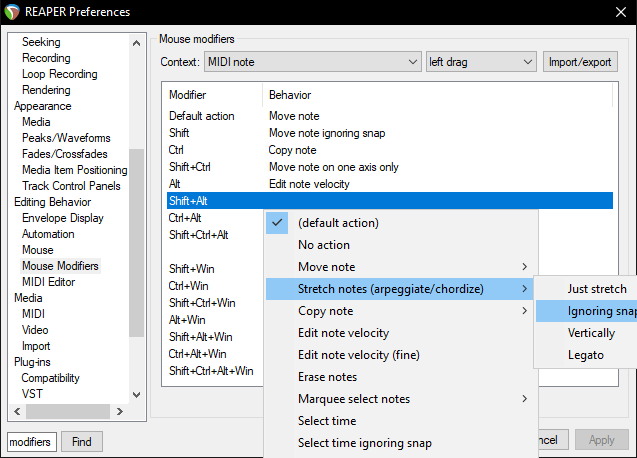
Set the Context to MIDI note, then choose any modifier you like, and finally right-click on it to set Stretch notes -> Just stretch / Ignoring Snap.
Straight note lines
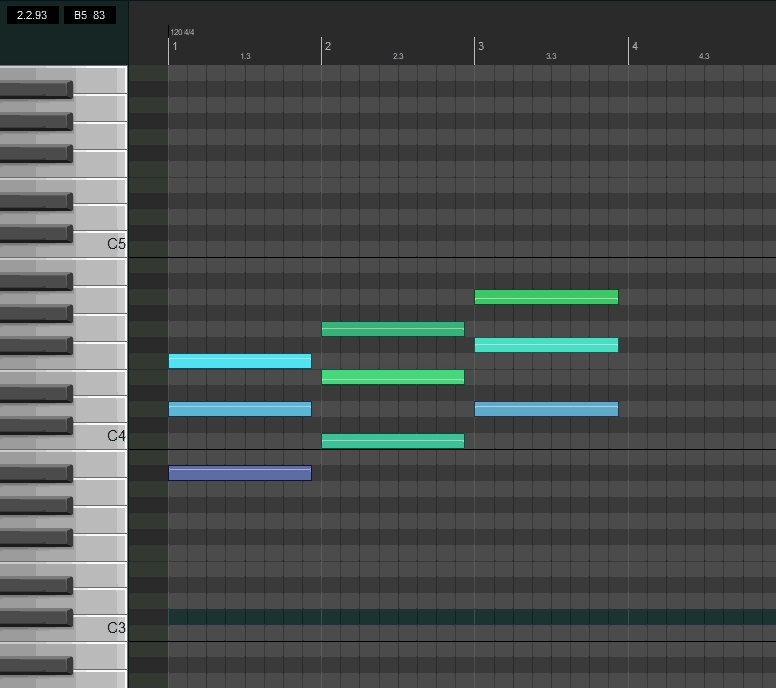
Create notes in straight lines by holding the hotkey Ctrl + Alt as you click and drag on the piano roll.
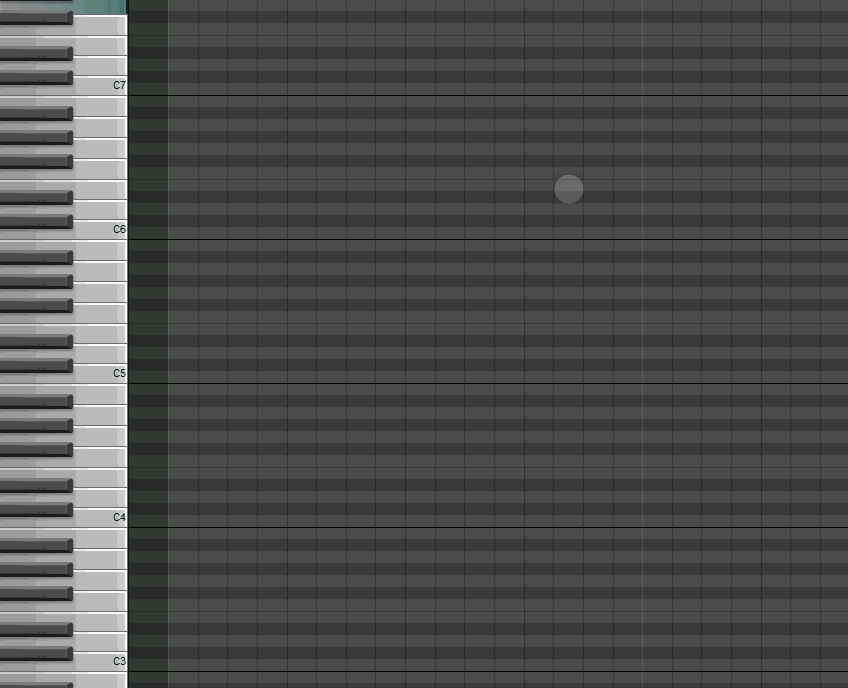
To create vertical straight notes, use Shift + Alt.
Playback
You can prevent piano roll window from scrolling to playhead position by heading to the main menu bar -> Options -> Automatically scroll view during playback.
Themes
Unfortunately, I will not be diving deep into the process of creating REAPER themes. Instead, you could look for a user-generated theme you like from the REAPER Stash.
Procedures on installing the theme are described in their respective theme descriptions. Usually the *.ReaperThemeZip file is to be placed in the REAPER\ColorThemes folder.
To enable the theme, open the menu Options -> Themes -> <theme-name>
Miscellaneous
WASAPI shared mode
When using 'Shared mode' in the WASAPI audio interface, you will need to make sure that sample rates are synchronized between your speaker driver and microphone driver (aka output and input device, respectively).
A way to do this is to:
- Open the Run box by pressing on your keyboard
Win+R - Input
mmsys.cpland press enter. - On the 'Playback' tab, double-click on the item which is marked as 'Default Device' (usually, it's the Speakers)
- Click on the 'Advanced' tab.
- Take note of the current sample rate:

- Close the current window to go back.
- On the 'Recording' tab, double-click on the item which is marked as 'Default Device' (usually, it's the Microphone)
- Click on the 'Advanced' tab.
- Now, you can choose whether to sync the sample rate of the Speakers to the Microphone, or vice-versa. All that matters is both of them should have the same sample rate.